Merry Christmas Wrapping

Need a little help with your Christmas gift wrapping?  How about these Christmas gift tags, FREE from Mrs Fox's just click to download, print, cut out and use.  Please do...


0

I Make Dolls - Buy a Kid a Doll for Christmas


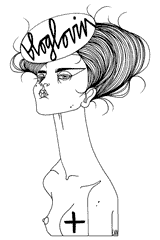
Mrs Fox's has allowed us the freedom to start making things again.  It's silly really, I shouldn't have needed to start a small business to have this freedom, but somehow I did.  And it has taken two years for me to start making these dolls, because I was not sure what they would look like.   I'm still not sure, but the above picture is of my first 4; "The Party Gang".

I've always made things, I loved art at school, I just wanted to make things all the time.  I watch my daughter's absorbed, intent, crafting of hedgehog houses and wooden peg dolls (this week) with complete understanding. And when I was little I loved making things for my dolls. Playing with them was all about creating their world: Their clothes, gardens, suitcases, cars, animals, furniture, tents, houses, horses, boats, gypsy caravans, farm, horse drawn carriages, boyfriends... to name but a few of the remembered projects, the list is endless.  I made their world, and that is only part of what is wonderful about dolls.

My mother in law always tells me proudly that she was not a 'girly girl' and never played with dolls.  I always reply that, I am not, and was not, a girly girl but that I loved dolls and played with them a lot. And my son likes to play with dolls too.  My children have beautiful dolls, often ones that I, or someone else, have hand-made. There is a story to every one they have and they are special.

I am still working through what it is that I think is so special about dolls.  I know many people will not agree with me.  That they are often seen as a bit boring, babyish and the culprits of gender stereotyping.  They are not of course, it's people who gender stereotype.  Even Barbie, who I despise, in the hands of a little girl can do all sorts of amazing things.  My daughter's Barbie has been known to fight in intergalactic battles and clearly has super powers of some kind.  (And also pink fairy wings!)

I make dolls - buy a kid a doll for Christmas - one made by hand.  It doesn't have to be one of mine, there are some far more beautiful dolls out there.  But, I think they are misunderstood and I think they can be the agents of enormous creativity.  I make dolls with love and to be loved.  I really do.  For me, they are the repository of memories and emotions and they can be the agents of change and creativity.  They can be comfort and they can help work out problems.  Dolls are wonderful, wonderful toys.

I'm crafting 4 dolls at the moment for a little girl and her cousins:


Dog steals leg...


And from this point on it is mostly hand stitching... so I had better get back to it.

0

Bumper Christmas Craft Box

Our last Mrs Fox's Crafty Boxes for the year went out to our subscribers yesterday - phew!  Our November Crafty Box was all about making Christmas things for people we love; Christmas cards, gift boxes, a trivet, concertina tree's and more.  December's subscribers will be making pine cone elves, lollypop stick angels, felt snowflake decoration, garlands and thank you cards.

For our friends who take a box here and there, we've put together some of our favourite crafts from both boxes and come up with a BUMPER Christmas Crafty Box.

In this box is all you need to make;

a wooden Christmas trivet;


lollypop angel and toilet roll santa instructions;


felt snowflake decoration;


blank cards & envelopes; ideas with templates and decorative paper for Christmas cards or thank you cards;


snowman paper chains;


concertina Christmas tree ornaments;


pom poms - along with easy instructions to make a gift box and recipe for gingernut biscuits.


All in all, hours of innovative crafting Christmas fun for busy little hands - only a few boxes left… and available for £15 through our store.


0

An Angel has come to visit


I love to mooch around reading other people's blogs when I am supposed to be working.  Often what catches my eye is a beautiful illustration or a great photo.  I started to read Flora Jamieson's blog; Through The Round Window because of her love of Pipi Longstocking and on seeing a photo of a decaying cottage that I sort of wished I lived in.  I noticed she had a Folksy store and loved her designs, I don't think I notice they were stained glass at first.  I thought I wasn't a real fan of stained glass, but I still enjoyed her blog.

Every year I buy a new 'special' Christmas ornament, the tradition used to be I'd buy it on a shopping trip to Liberty with my friend, Sam.  But no Liberty trip this year I'm afraid and I thought I'd get something from Folksy and support a designer maker.  So I went back to Flora's store and got the angel above.

She arrived yesterday and is so beautiful, the photo just doesn't do her justice.  I am now looking around the house for an excuse, any excuse, to get more stained glass.  I have even cleaned my windows today (after taking these pictures) just so my beautiful angel looks her best.


1

Handmade Christmas Cards - Part Two

The first Christmas Card shows a scene of a family raising a toast to the Holiday Season
Our modern Christmas cards can be traced to a card printed in December 1843 by Sir Henry Cole, the first Director of theV&A.  Sir Henry found it time consuming to write greetings and best wishes to all his friends and family at Christmas and so he commissioned John Callcott Horsley to illustrate a card with a single greeting: 'A Merry Christmas and A Happy New Year To You".  Sir Henry had also been involved in the introduction of the penny post in the UK three years before so he had something of a vested interest in the success of this new form of holiday communications.  His print run of 2050 cards sold for a shilling each (a weeks wages) and only 12 of these cards remain today.


We of course love the hand-made variety.  For the last few weeks we have been churning out hand-made Christmas cards at a phenomenal rate. The exchanging of Christmas cards can also be traced back to the "Christmas Pieces" made by children in the early 18th century.   Children copied out texts at school in their best hand writing and decorated them to give to their parents.  Intended to show parents how well their children were doing at school, these are some of the earliest examples of children's art.

Very much in that tradition Little Una Fox used her new sewing skills to create this lovely card for her Uncle David in Canada:


You Will Need:
5 or 6 different buttons
needle & thread
card & envelope
pencil, pen &/or  letter stamps

Instructions:
We first wrote "Merry Christmas" along the bottom of the card - we used our letter stamps but you can simply write this in colourful letters in your best hand writing.

We decided where the buttons would go and then drew the lines and bows onto the card in pencil first to get the spacing right.  Then went over this in black pen.

We then carefully, with needle and thread, sewed each button into position with just a couple of stitches, knotting the ends of the thread at the end.


Last month's Mrs Fox's Crafty Box contained card blanks and envelopes so that our crafty little foxes could make Christmas cards for friends and family.  They are also included in our Bumper Christmas Crafty Box that includes a whole host of Christmas crafts and is available for £15 +p&p.

The little foxes came up with so many designs for Christmas cards that we've been posting all last week with ideas for hand-made Christmas cards, we’ve also put together the best of other people’s ideas on a board on our pinterest site.  So with oodles of inspiration at the click of a mouse, we would love you to send us some pictures of your creations, we could add them to the gallery.


For loads more Christmas craft ideas including more designs for handmade Christmas cards CLICK HERE
0

Handmade cards - Christmas Holly card.

OK, here we are with another easy design for you to customise in your own unique way.  Holly is wonderfully Christmassy and a plant which is only really truly appreciated this time of year, so to show our appreciation for this prickly symbol, we took a very standard design which we initially used in our November Crafty Box on a trivet for our crafters to make and placed it on a greetings card.
The trivet is also available in our bumper Christmas Craft Box, in which there are also materials to make angel decorations and a felt snowflake decoration, Christmas or 'thank you' cards and lots more to boot.


You will need;

  • card/heavy paper/old Christmas card
  • scraps of wrapping paper
  • white paint
  • paintbrush (or finger)
  • glue


Instructions;

  1. On a scrap of nice paper, draw two holly leaf shapes and cut them out
  2. Using a contrasting paper, cut out three small balls for berries
  3. Fold your card in half or use an old Christmas card and in the middle paint a messy large white snowball
  4. Arrange and stick your holly leaves in the snowball and then stick the berries in place
0

Handmade Advent Calendar


I love advent calendar's, but I hate rubbish chocolate.  One year I fobbed the little foxes off on the Cbeebie's online advent calendar of music and video clips, claiming it was better than getting a sweetie every day.  They were young.  They were innocent.  There is no way they are falling for that this year!

I was working on this month's crafty box, I'd a nice design for a loo roll Father Christmas when I suddenly thought; 'This could work as an advent calendar'.  So, I began collecting loo rolls; 25 of them.  Making white pom poms; 25 of them.  (I've posted on the easiest way to make these - with a fork would you believe.)  I used my design for this year's Mrs Fox's gift tags (which are FREE to download) for the Father Christmas' face - you can download and print 25 Father Christmas faces HERE.


So, here's how you make the advent calendar:

You will need:
25 loo rolls - Never thought I'd get to say that!
red paint
white wool
fork
black pen
string
S
stick or bamboo cane - optional
sweets and/or little gifts
glue
scissors
and Mrs Fox's printouts.

First paint your 24 loo rolls red and leave to dry.  While they are drying make 24 pom poms instructions are HERE.  Leave the string you use to tie round the centre of the pom poms long, as you will use this to attach the pom poms to Father Christmas' hat.

Take your red loo rolls and fold them as follows:


Print and cut out the Father Christmas faces and the numbers from Mrs Fox's.  Glue them onto the loo roll and draw the rest of your Father Christmas onto the loo roll with black marker.  Draw one hand holding the number.


Make a small hole with a darning needle in the top of each Father Christmas.  Through the hole thread the pom pom strings and secure to his hat with a double knot.  Next, thread your pieces of string through the top of Father Christmas' hat and knot in a loop.  I cut my string different lengths so Father Christmas could hang at varying heights.


Fill each of your Father Christmas from the leg end with a sweet (I have 2 children and put one for each child in mine).  I put a small gift in the 24th Father Christmas so they have a little something extra on Christmas Eve.  I figured they get so much on Christmas Day that I would make Christmas Eve special instead.

I looped each Father Christmas in numerical order onto a stick that we had found on one of our dog walks and have tied another piece of string onto this to hang it over the mantle piece.  You could use a bamboo cane or you could instead tie the Father Christmases onto a longer piece of string making a garland, or hang the Father Christmases onto wall mounted clothes hooks, over a mirror or a piece of furniture whatever works best in your home.

I can't wait to hang my advent calendar over the mantle piece on Saturday night, when Brian the Elf should also be arriving - more about him follows.

We've loads more crafty Christmas ideas this festive season, so why not subscribe to our blog and/or newsletter.  And some of the best ideas for crafts with children we've distilled into a Christmas Craft Box that we will deliver to your home for £15 +p&p, check out the contents HERE.
4

Handmade Christmas Cards - The Not So Lonesome Pines.

So the Lonesome Pine Christmas card was simple and surely there couldn't be a more simple card to make... well, perhaps not more simple but then, maybe as simple.
Instead of the Lonesome Pine, which seems a rather sad title for a Christmas card (especially as the pine is not an unhappy one), we thought we'd bring in a few friends, hence the Not So Lonesome Pines.
Just as easy and just as beautiful.              

You will need;

  • card/heavy paper/old Christmas cards
  • scraps of wrapping paper
  • white paint
  • paintbrush (or finger)
  • glue
  • scissors
Instructions;
  1. Fold your card or use an old Christmas card and along the bottom half, messily paint a snowy landscape
  2. Cut triangles out of your paper scraps or old cards
  3. Cut some strips out of paper scraps for trunks
  4. Stick the trunks around the snowy landscape
  5. Stick a triangle over the trunk
  6. If you wish, using a finger or a chop stick, dot snow around the trees

1

A Creative Weekend

Monday, and I've;

taken the little foxes to school;

walked the dogs;

baked some bread;

packed some foxes;

have a new host of felted animals on Folksy,
feeling pretty good.  What did you do today?


2

Handmade Christmas Cards - The Lonesome Pine.

Making a beautiful Christmas card at home probably couldn't get more simple than this, yet the finished item is charming by this very simplicity.


You will need;

  • card/heavy paper/old Christmas card
  • old Christmas card (to cut shapes out of) or,
  • wrapping paper scraps
  • glue
  • scissors
  • white paint
  • paintbrush (or finger)

Instructions;

  1. Either fold a piece of card or use an old Christmas card and messily paint the bottom half white
  2. Cut 3 equal sized triangles out of your paper scraps
  3. Cut a strip of paper/card to use as a tree trunk
  4. Stick the trunk near the bottom of the card.
  5. Stick the triangles so that the top points overlap the next triangle to form the top of your tree
  6. Stick the tree over the trunk so that it pokes out of the tree's skirt
  7. Using white paint on your little finger or a chop stick, dot falling snow around the tree
  8. If you are using an old card, cut and stick a piece of paper inside over the old message so that you can write your new message to the recipient
Hey presto!  Easy for small and big people alike to make lots of these, all slightly different - same same but different, as they say in Thailand!
0

Two Parties


Along with getting all our Christmas boxes out to our crafty subscribers Mrs Fox has also been busy with parties.  

We had a rock and roll baby shower to put together for three mavens of the media world.  


And a party for a nine year old who loves books.  Can you spot who here favourite author is?

Tableware

Peach lanterns

Invitation and breakfast kit

Midnight Feast Kit Party Bag


Bunting
Party Craft - Wooden Spoon Dolls

Pinata


Mrs Fox's can create a themed party box for any occasion.  Handmade and unique our party boxes are lovingly created and will arrive at your home by courier with everything you need to hold an inspired party.  Get in touch for details info@mrsfoxs.com. 
0
Back to Top